Wing Foiling 101: A Beginner’s Guide to Everything
India HudsonShare
Wing foiling. The newest addition to the world of Watersports has taken off by storm, with many avid windsurfers, kitesurfers and even newbies to Watersports now venturing down the path of foiling! The buzz around harnessing a new skill and taking off in lighter winds makes for fun on the water all year-round.

At Poole Harbour Watersports, even we can get confused on what the kit all means, so we have put together a beginner’s guide to wing foiling to break down the components, the sizes and what may be best for you, even if you have participated in other water sports before or none at all. We use our experience on the water, expert advice from reps and riders and feedback from customers over the last 5 years to provide the best guidance possible for everyone.
If after reading this blog, you still have a couple questions to make sure you are getting the right kit, we are happy to help on 01202 700503 or drop us an email at info@pooleharbour.co.uk
What is Wing Foiling?
Wing foiling is a sport that involves you standing on a board that has a hydrofoil underneath, and as you hold the handles of the wing and position it up, the wind catches and propels you along the water. As the board speed picks up in the wind, the foil begins to lift and you rise above the water and can continue foiling with less effort as only the foil is on the water and there is less water-surface drag.
Wing foiling has taken massive interest due to its blend of other water sport disciplines. The wing itself is essentially a small kite with handles instead of the lines and bar, and the sailing position and placement on the board is similar to windsurfing. Blend this all together with a simple set up of wing, foil and board; and the ability to go out in lighter winds, no wonder it has taken the interest of all water sport lovers!
Essential Gear for Wing Foiling
An attractive aspect of wing foiling is that it is pretty simple to set-up and go! Three components will allow you to get up foiling, and they are a wing foil board, wing, and foil!

Wings
Wings are similar to windsurf sails, and if you’re not a windsurfer, then what we mean is that certain models are optimised for particular style of riding, ie. General blasting, waves, racing or lightwind!
You want to pick the style wing that is suitable for your riding and the conditions you go out in so that is performs how you want it to. Sizing of wings is also dependent on these factors but also your size too, check out our specific blog on – “What size wing should I be going for?”
One final advice on types of wings is that the style of handle varies too and certain riders prefer one over the other. There are 3 styles:
- Mono handle/ boom – similar to windsurfing, ability to move and adjust hands where you please. (example: Duotone Slick)
- Hard handles – stiffer and more responsive handles and better for more control in higher winds (example: Naish ADX)
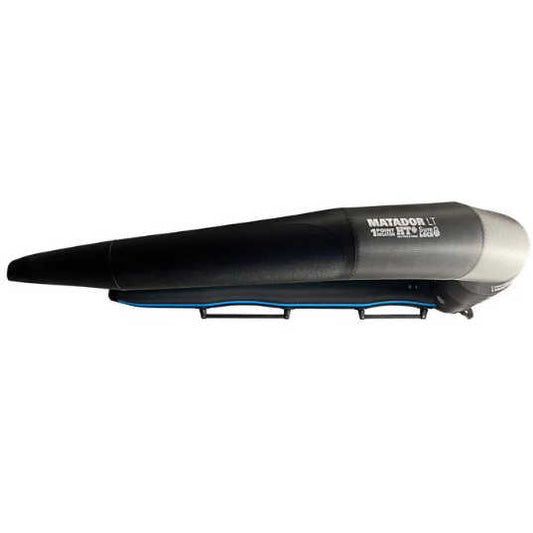
- Soft handle – light, easy to pack and adapt to wind tensions. (example: Naish Matador LT)
Browse our complete range of wings at - Wing Foil Wings.
Foil Board
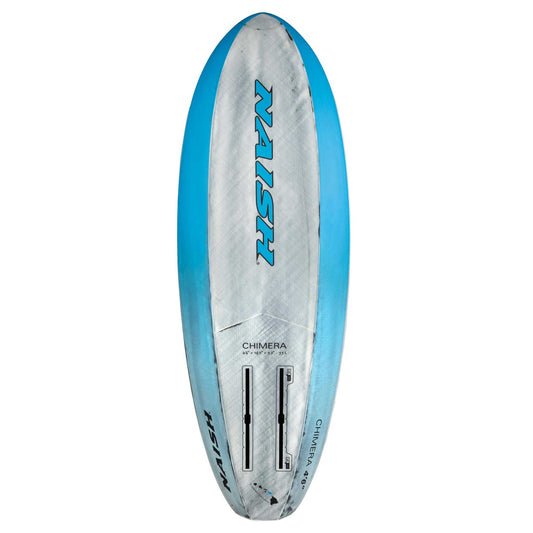
Similarly to wings, wing foil boards have been developed so that certain boards are designed for specific riding conditions, whether that be for light wind, learning, waves, or jumps and tricks.
Beginner boards are generally chunkier, wider and packing volume for a comfortable take-off. Light wind boards are longer, thinner and pointed so that they slice through the water and air for maximum efficiency. Wave and freestyle boards are shorter and more packing in with volume for easy jumps in the air. Each brand of wing board has their own range with slightly varying features.

Sizing of the board (the volume) is also relative to the style and skill level of the rider. A rough rule many people follow is –
30-40L above rider weight = floaty, able to stand on board, suitable for beginners
10-20L above rider weight = less stable but still stand, good for progression or those learning but with previous water sport experience
Rider weight – intermediate riders
10-15l below rider weight – sinker and experienced rider, likely using for freestyle or waves.
Check out our complete range of boards at Wing Foil Boards.
Foil
When learning to wing foil, choosing the right foil is crucial to make the learning process smoother and more enjoyable.
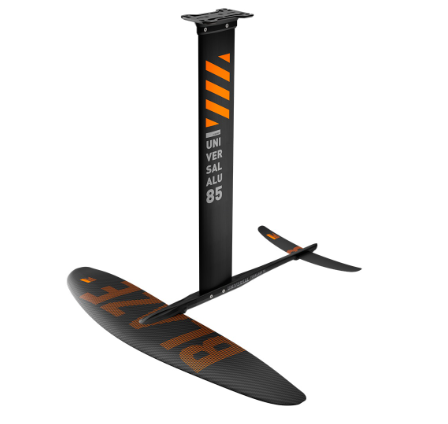
Foils are categorised and sized based on the surface area of the front wing, for example you may regularly see them described as 1750 or 2000, which is actually in cm2. A larger foil generates more lift at lower speeds, which is ideal for beginners. It helps you get up on the board more easily and stay stable. The extra lift allows you to foil in lighter winds and at slower speeds, which is great when learning to balance and control the foil. Larger foils are categorised generally as something from 1650-2400cm2, dependent on your rider weight.
Smaller front wings, 1700cm and smaller, are more responsive and faster, but harder to control for beginners. These are more suited to advanced riders or those learning that are lighter riders and around 65kg or less.
For learning, you want a generally 'lower-aspect' foil which describes the shape of the wing - wider, shorter wings. These are generally more stable, forgiving, and easier to control for beginners. They provide good lift at lower speeds and are easier to ride.
As you progress with your wing foiling and beginner to size down, you will then lean more towards 'higher-aspect' foils - narrow, longer wings. These wings are faster and more efficient but harder to balance and control, so they are better for experienced riders looking for speed and performance.
Mast lengths can vary too, anything between 70-85cm is great for learning, you may want to veer towards the shorter lengths if the area in which you foil is affected by tides a lot. Longer masts are better for choppier conditions and for carving over waves.
For learning, prioritize foils with more lift and stability rather than speed so that you can progress quicker and more efficiently!
If you are having a hard time deciphering the right foil for you (which ones are lower aspect), take a look at our Complete Wing Packages and they will include the foil that is suitable for beginners.
Alternatively, check out our complete range of foil here at Wing Foil Foils.
Safety Gear
Compared to other wind sports, wing foiling is an activity where wearing protective equipment is recommended. A helmet, impact vest with buoyancy and a wrist and board leash are what most riders wear. When foiling you can hit the water and/ or the kit as well when you crash, so best to keep your head and body protected from the impact and the sharp edges of the foil!
Especially during the learning phase, you will find wearing protection is a must when getting out on the water. There is the aspect of falling off, but also what many don't realise is when you walk out with your kit, the foil may be in the air as the water is not always deep enough, this increases the likelihood of that foil hitting you on your head! Plus, after falling off, having a leash attached to your wing and board, means less swimming after your board that will be going with the tide and wind :)

If you want more information on safety gear, take a read on our two blogs below:
What impact vest should I be wearing?
Otherwise, you can browse our Wing Foil Protection range.
Learning the Basics
Getting Started:
Tips on how to get started with wing foiling, including finding a good spot with suitable conditions.
- Our main tip with starting winging is don't jump the gun! Start off slowly and only progress when you feel confident and comfortable with handling the wing. To start your journey, a wing and you on a beginner windsurf board or windsup is ideal, something with lots of volume and a fin to go upwind means you can practice holding and manoeuvring the wing to go in the direction you want, as well as trying to stand up when moving!
Find a spot to practice that isn't too gusty, somewhat flat water and a wind up to 16knots that blows you back on-shore so you can safely get to land.
Lessons are a good way to nail the basics of wing manoeuvring and the wind in general, so take a look at our 2-hour wing intro for £65.
Basic Techniques
Step-by-step guide to basic techniques like standing on the board, holding the wing, and balancing. The first basic technique, is to always have the wind behind you and your wing in front of your body, so that the wing then doesn't get blown into your face!
Handling: There are generally three handles on the wing, the central one on the leading edge of the wing is the one you will be using when kneeling on the board and trying to get into position. Once you are able to tilt the wing to go across the wind, you can then move your hands to the other two handles and into the sailing position to pick up speed, this allows you to steer and move further up or down wind.
Once confident and sailing across the wind, we suggest you try going from kneeling to standing!
We suggest you try getting up once you are moving slightly as this can actually be easier from a balance point of view as the water chop will not be hitting you from behind as much.
First Steps
Getting up onto the foil can be a long process, and a lot longer than the first step of manoeuvring the wing. We recommend you only progress onto a foil board once comfortable standing and sailing competently on a standard non-foil board.
To get foiling, you will need to be able to pick up speed and hold your stance so that the foil can begin to lift.
Your stance should be with your back foot over the foil box, and your front foot shoulder-width apart but along the centre line of the board, so that you can keep the foil down when you come up!
Going from wing-surfing to wing-foiling can be a longer process and require more adjustment and practice, so if you want a lesson for further tips, take a look at our 2-hour Wing Foil lesson for £125.
If you are patient and persistent, as with anything you will be flying on the foil in no time!


